
Azure DevOps Sliding Date Window for OData Queries
Azure DevOps sliding date window filtering provides a simple way to keep your OData datasets relevant without having to constantly update filter dates. In previous blog posts, I used a fixed date in the OData filter to return the work items that were created or updated after a specific date. The approach works well, but it requires you to update the date to keep the dataset relevant and to limit the result set. In this post, I will show how to replace the fixed date with a sliding date window. Instead of filtering from a hardcoded date, the query dynamically returns work items within the date window. This keeps the dataset smaller and the refreshes faster.
Benefits of a Sliding Date Window
Most Power BI reports don’t need years of historical work items to produce reports. Dev teams are typically focused on the current and past few sprints to manage work. Using the sliding date window allows your report to target the date range for the work items that matter. This approach is similar to using an Analytics View with a date filter, but it can be implemented directly in the OData query. In this blog post, you’ll learn how to create a configurable sliding date window, manage the supporting parameters, and apply them to your OData query. As the window moves forward on each refresh, work items outside the defined timeframe are automatically excluded from the dataset, helping keep refreshes efficient and create a smaller data model.
Creating Parameters for the Date Window
Create the ODATA query to return the work items needed for your report. Here is a blog post that shows how to get started with an ODATA query that replaces the need for Analytics Views.
The example ODATA query and sample Power BI report are located in this GitHub repo <TODO: Add Link>
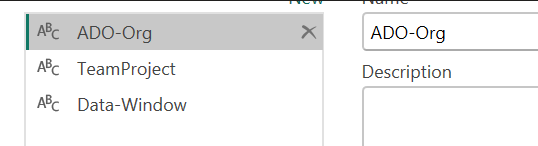
The Data-Window parameter is for the number of days for the sliding data window. If you enter 90, the ODATA query will return the new or updated work items in the last 90 days from today.
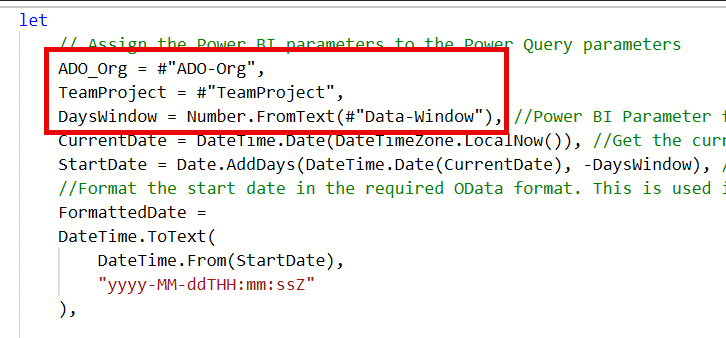
The ODATA query in Power BI now looks like the following:
Enter your credentials. This can be a PAT or the Organizational Account, which is preferred.
Rename the query to Workitems or something else to use in the report’s data model.
How the Date Window Parameter in ODATA Works:
The Power Query code creates the ODATA filter from the Power BI parameters. The DaysWindow variable is converted to a number from the text parameter. The StartDate parameter is Today minus the number of days to go back in time. The FormattedDate parameter is formatted to the ISO 8601 format for the ODATA query.
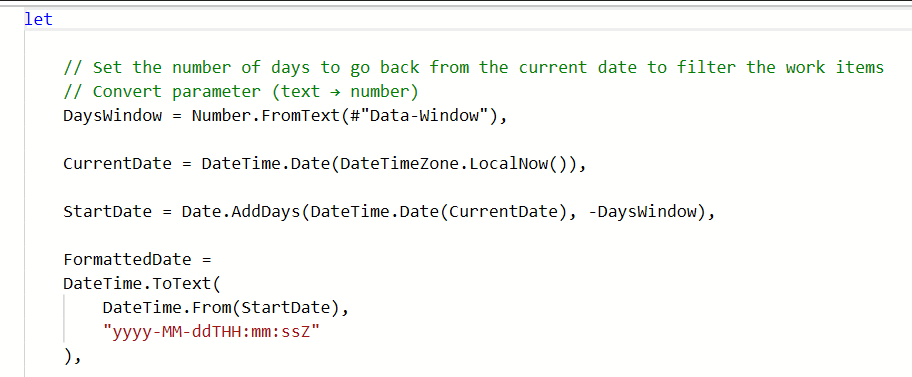
The ODATA query uses the AnalyticsUpdatedDate in the filter clause to determine the work items that are either new or updated in the last X number of days.
Once the Power BI parameters are inputted, test the ODATA query to return the work items.
NOTE: Your report will be throttled by the ADO service if you attempt to query too wide of a date range. Set the time window to a reasonable size. Don’t expect to return 100ks of rows without the possibility of being throttled.
Happy ADO Reporting!
GitHub Example File:
Here is the link to the GitHub markdown file describing the how to use the example file and the repo where the Power BI file is located.