Dynamic Azure DevOps Reporting with OData Parameters
One of the first things I add to an OData query in a Power BI report is parameters. The parameters make the report easier to maintain, reuse, and adds flexibility as reporting requirements change. Instead of modifying the query every time you need a different date range, Team Project, or filter, you can simply update a parameter and let the report do the work. More importantly, parameters allow the filtering to happen at the source rather than inside Power BI after the data has already been retrieved. This reduces the amount of data returned and improves refresh performance. Parameters are a key design pattern that enables reports to adapt to changing business requirements without requiring constant query modifications.
Build Reusable Azure DevOps Reports
This blog post builds off of the ODATA query introduced in the first blog post located here <Add Link>. Parameters make your report dynamic and allows for reuse. It also ensures the ODATA query is stable and will run more efficiently.
Power BI does not support parameterized ADO queries using the ODATA connector directly. Instead, you need to manually add the parameters to the Power Query code. This involves creating parameters in Power BI Desktop and then incorporating these parameters into the ODATA queries within the Power Query editor. This approach allows for flexibility in data retrieval but requires manual intervention to set up and maintain the parameters in the queries
ADO Org and TEAM PROJECT PARAMETERS:
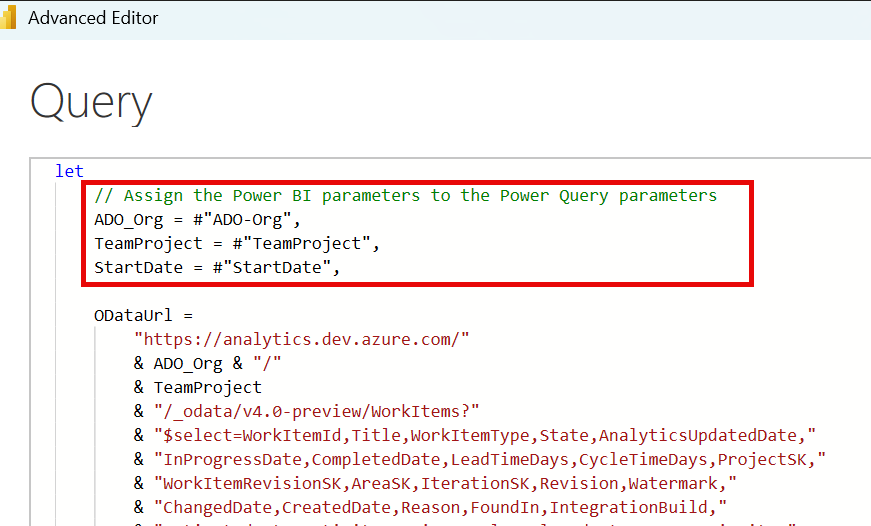
Follow the steps in this blog to add ADO organization and Team Project name parameters to the ODATA query. The updated Power Query for the report is located here <Add link to GitHub>
The full example report is located here <Add link to GitHub>
The ODATA query in Power BI now looks like the following:
Enter your credentials. This can be a PAT or the Organizational Account, which is preferred.
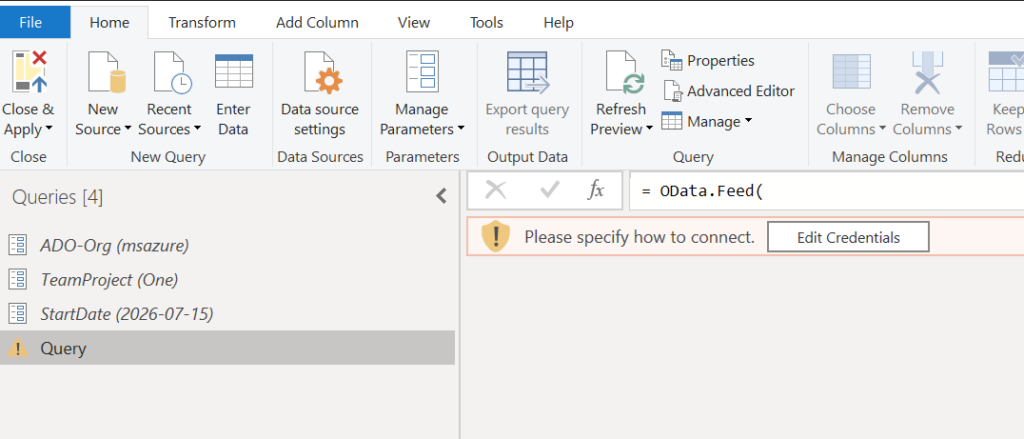
Rename the query to Workitems or something else to use in the report’s data model.
DATE FIELD MODIFICATIONS:
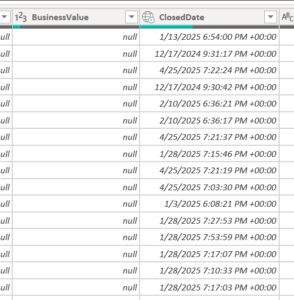
The date fields from the ODATA entities for ADO default to the DateTimeZone data type in Power BI. This means that they are UTC based and will include the number of hours from UTC in the field. This data type causes issues visuals in Power BI and should be converted to either Date or Date/Time. I find that converting to the Date datatype is most effective.
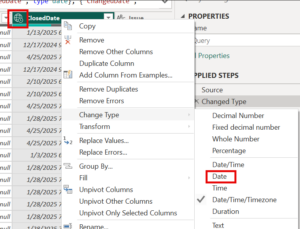
Either right click on the column header to change to the Date data type, or select the icon in the header to change the data type.
ANALYTICS UPDATED DATE FIELD MODIFCATIONS:
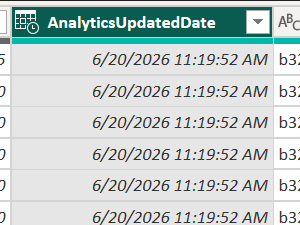
Unlike most date fields, the AnalyticsUpdatedDate is frequently used for incremental extraction and refresh logic. For this reason, it is recommended to keep AnalyticsUpdatedDate as a Date/Time field instead of converting it to Date. This field often becomes one of the most important columns in the data model when replacing Analytics Views.
EXPAND RELATED DATA TABLES:
After loading the data, the expanded entities will appear as Record columns inside Power Query. These records must be expanded to expose the underlying fields. For example, the query clause &$expand=Iteration($select=IterationPath,IterationName,IterationSK,StartDate,EndDate,IsEnded) is a connection to the Iterations ODATA entity. It returns the values from the Iterations table on the same row as the work item data.
For each entity:
- Select the expand icon in the column header.
- Choose the desired fields.
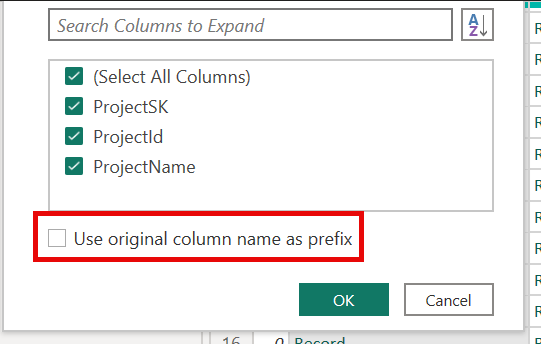
- Clear the option to use the original column name as a prefix if desired.
- Apply the changes.
Select the Expand option in the upper right of the column to open the dialog for each entity.

Unselect the checkbox to use the original name as a prefix and select the columns to add to the data model.
If you want to change the fields from the initial drop down, select the gear icon in the Applied Steps pane. This brings up the dialog.
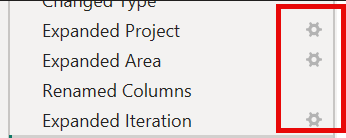
Rename the columns and change the data types as needed.
Handling Null User Values
Not every work item will contain values for AssignedTo, ResolvedBy, or ClosedBy. As a result, Power BI may generate errors when expanding user-related entities. The OData query attempts to minimize these issues through filtering, but null values can still occur.
The simplest solution is:
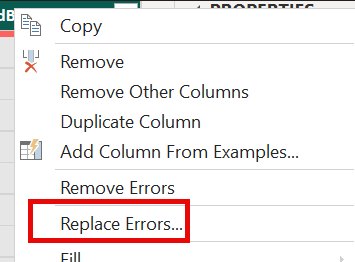
- Right-click the column.
- Select Replace Errors.
- Leave the replacement value blank.
This converts the errors to empty values.
Select Close and Apply to load the data into the Power BI data model and begin adding visuals to your report.
You can now use the same Power BI report for multiple ADO team projects!
GitHub Example Files:
Here is the link to the example Power BI file and ODATA query.